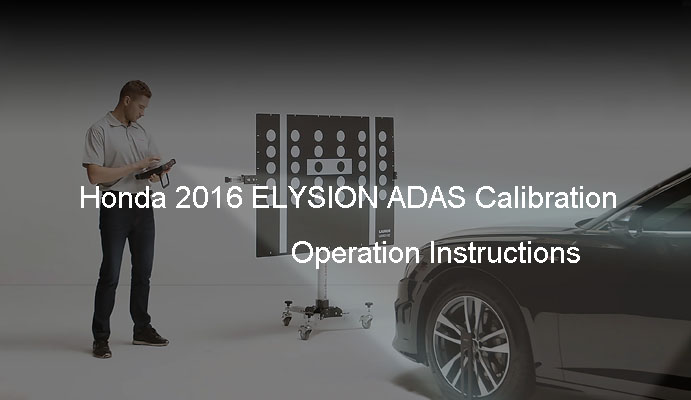
Honda ELYSION, 2016 model, VIN: LHGR83839E********
(1) The vehicle has the following failure records (no or wrong basic settings/adaptation)
① B14B3 – Camera alignment not complete.
(2) Vehicle parts are overhauled and replaced as follows:
① Replace and detach the front bumper.
② Replacement and detachment of the front camera.
③ Replacing and detaching door mirrors.
④ Replace and detach left and right cameras.
⑤ Updated wheel damping electronics or one of the vehicle height sensors of the height control system.
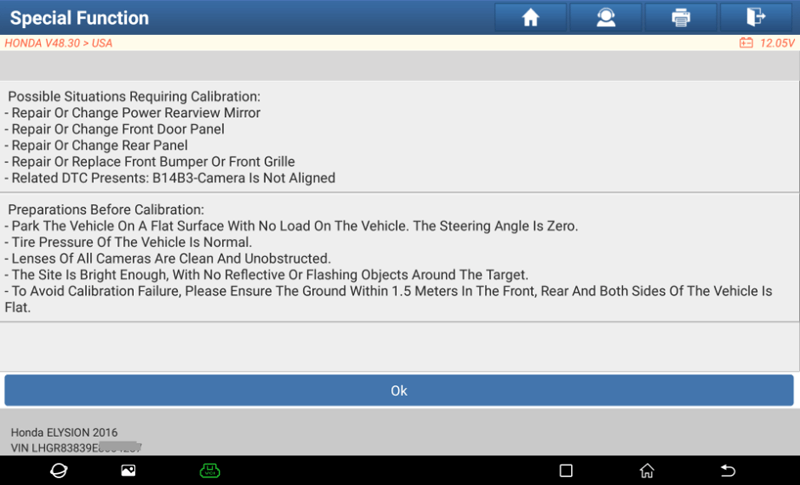
① The camera is clean and the field of view is unobstructed.
② All fault memory entries not related to calibration must have been processed.
③ Do not press the multi-view camera switch, you can check the status of the NAVI screen.
④ Do not turn the ignition switch to the off position during the alignment process until instructed to do so by the diagnostic equipment.
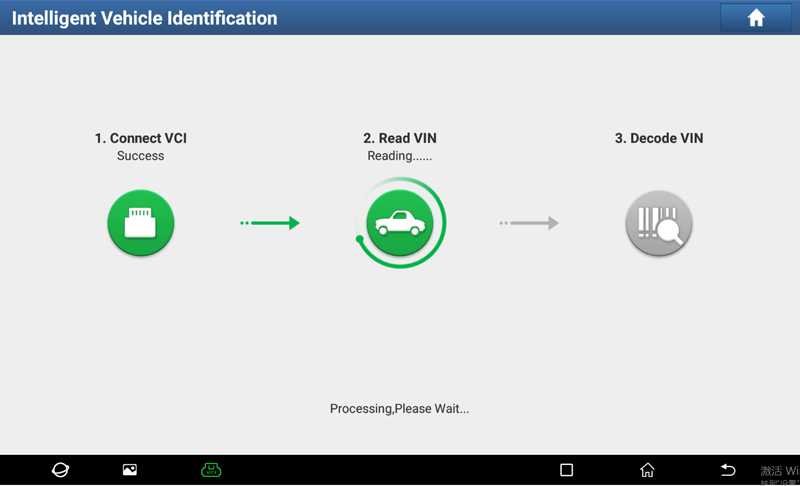
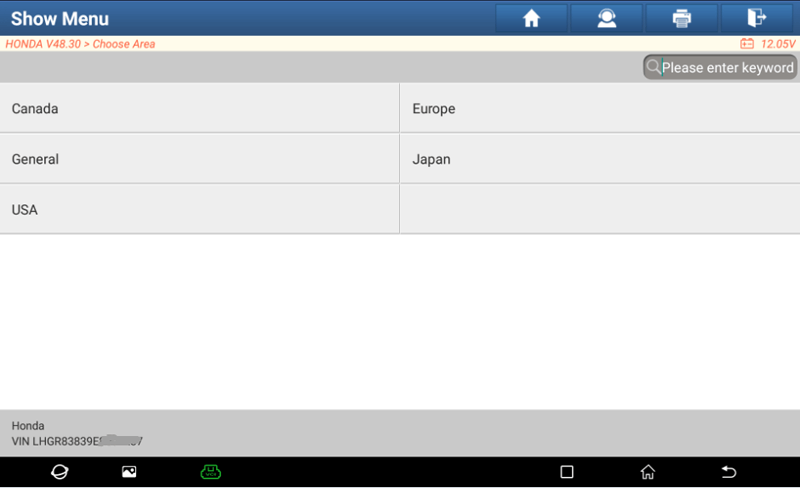
2. Enter the HONDA software, select the region "USA".
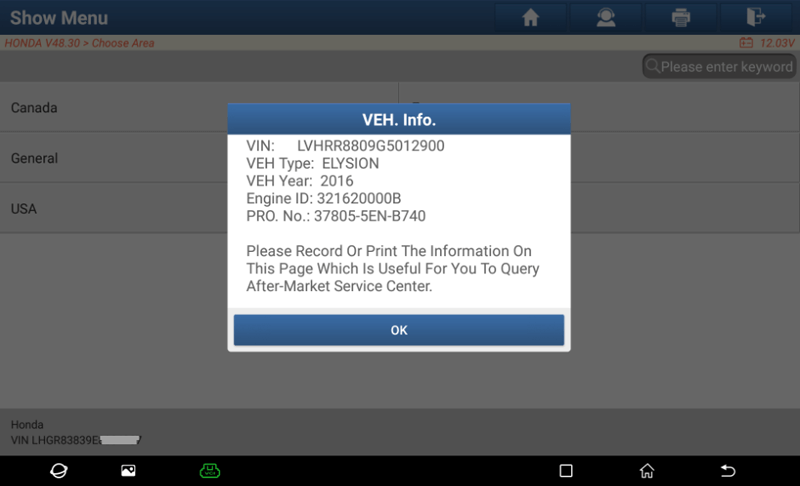
3. Get vehicle information.
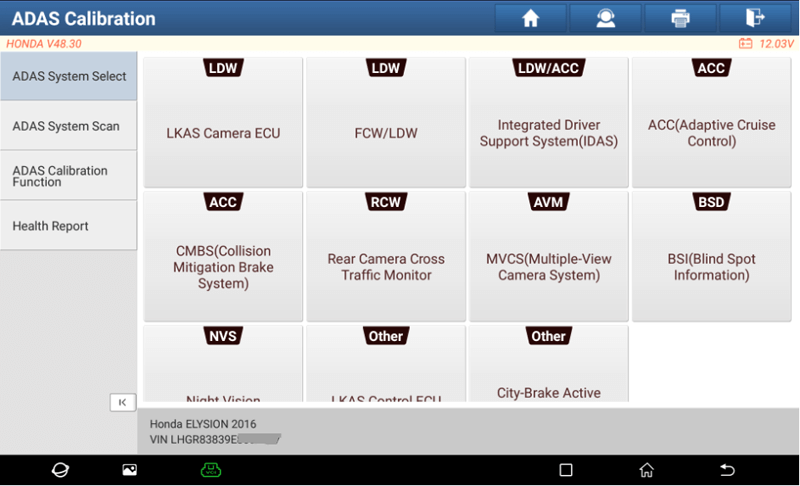
4. Click "OK" to enter the ADAS Calibration module.
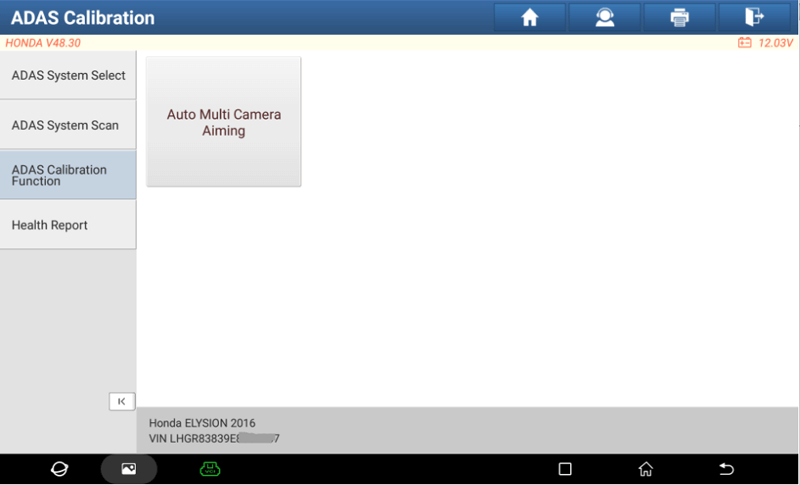
5. Select the "ADAS Calibration Function'' sub-module to display the function interface.

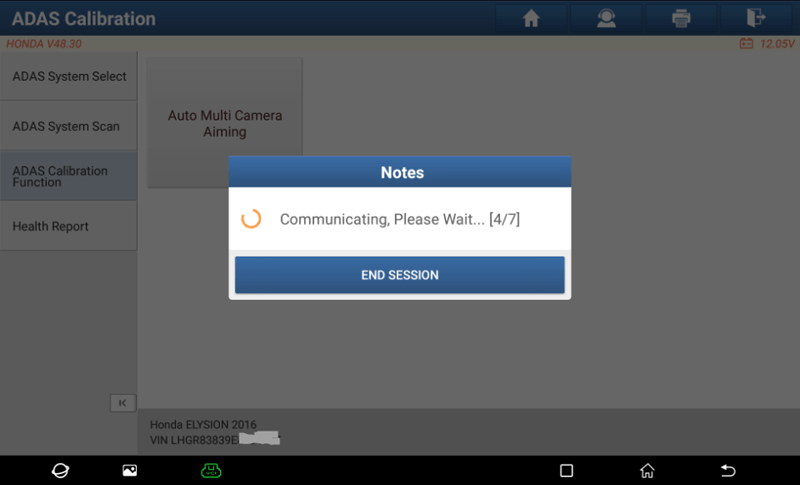
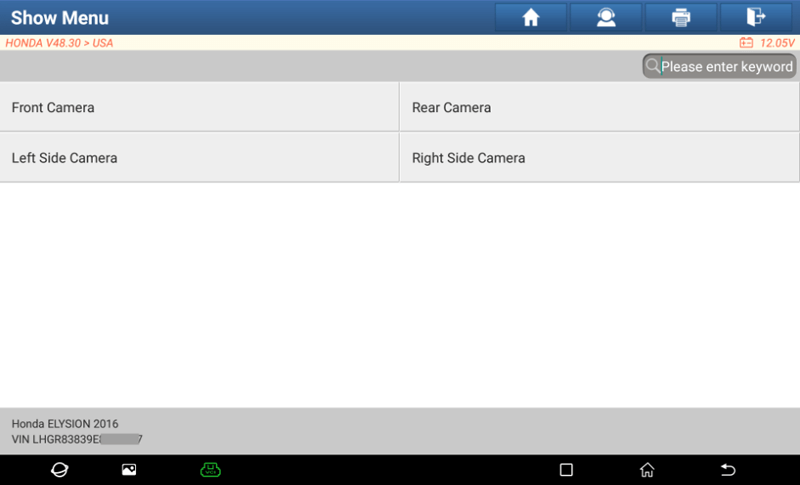
6. Select the "360°Camera Calibration", and display the sub-function "Auto Multi Camera Aiming".
7. Select "Auto Multi Camera Aiming" and search for this function. If successful, the pre-calibration preparation information will be displayed.
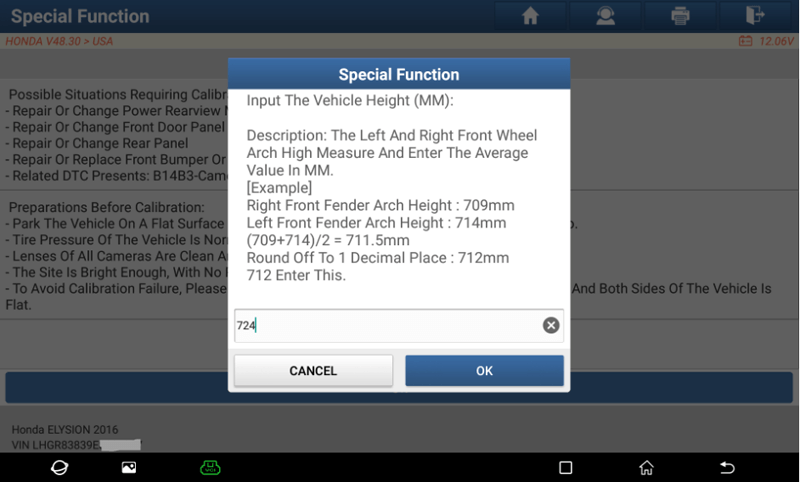
8. Measure the height of the left and right front wheel hubs of the vehicle, and input the average value in millimeters, such as: 724mm.
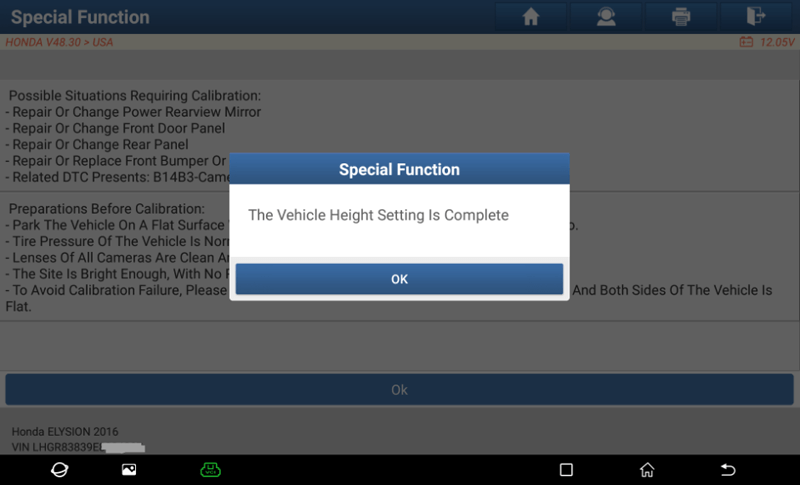
9. The setting of vehicle height is complete. Click "OK" to calibrate the front camera.
10. Select "Front Camera".
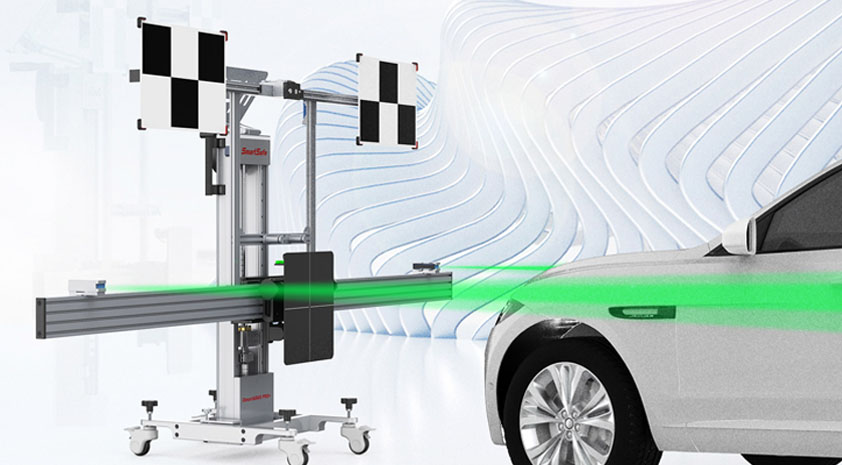
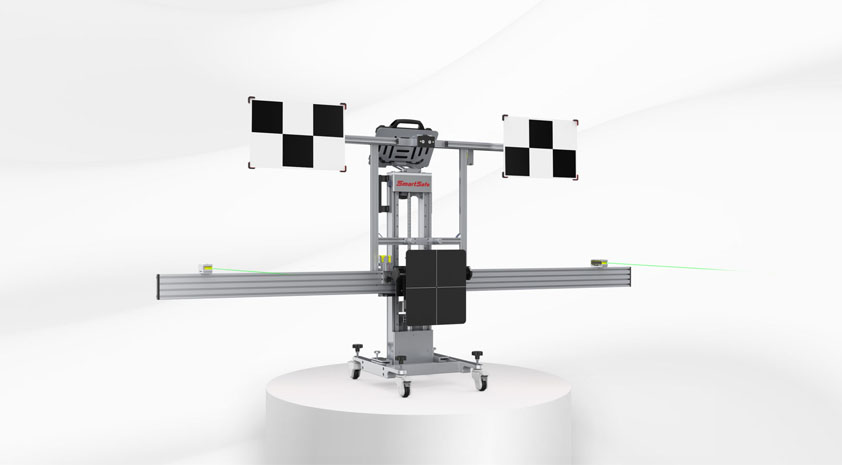
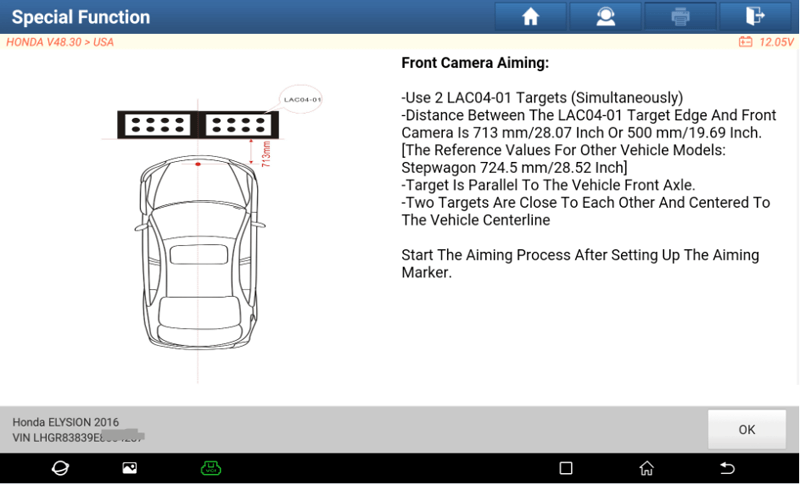
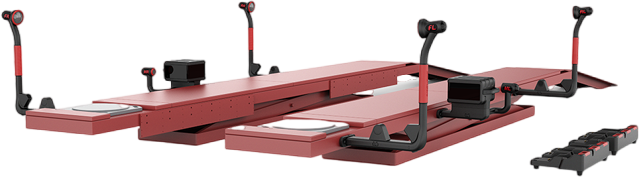
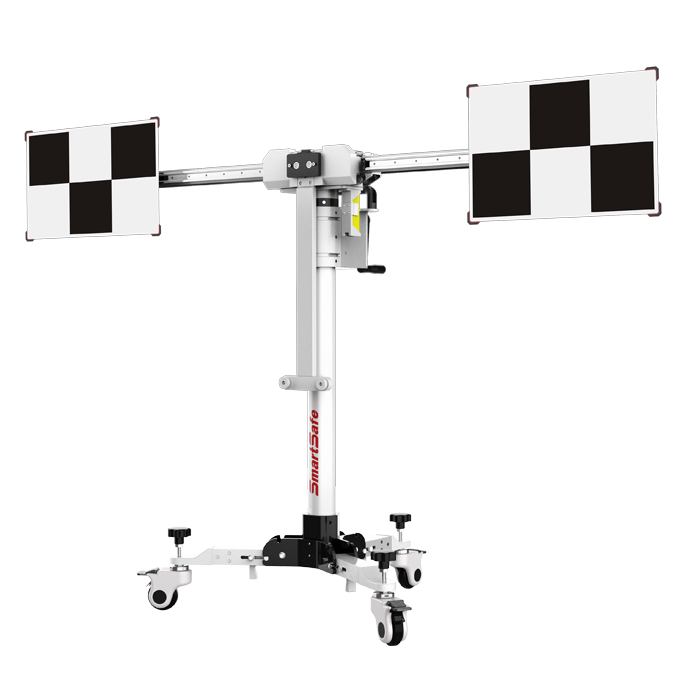
11. Follow the prompts to install the target.
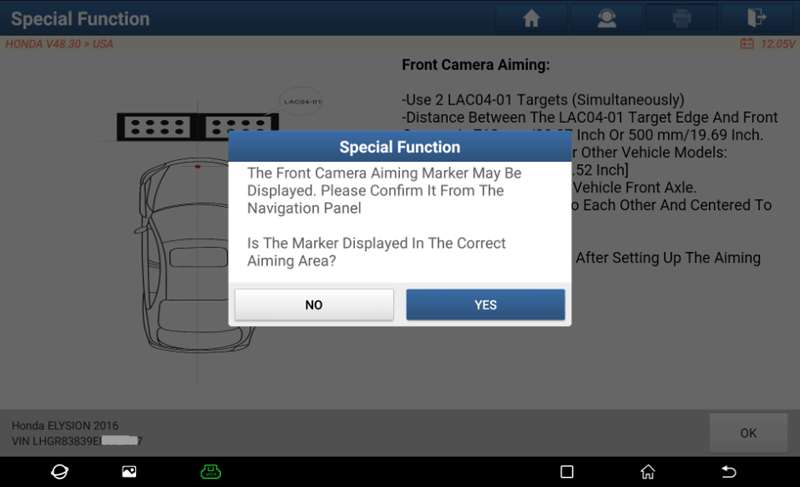
12. Front camera alignment marks may be displayed. Please confirm it on the navigation panel. The displayed markers are in the correct alignment area.
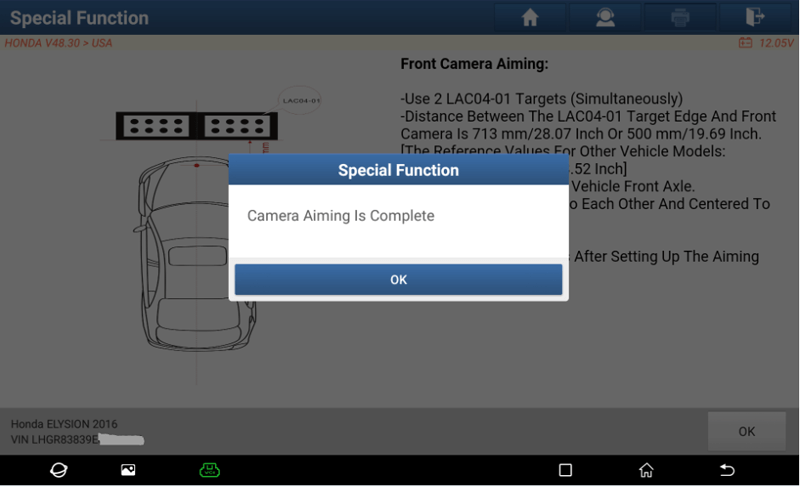
13. Camera alignment is complete. Turn the ignition off, turn the ignition on again, and check the ADAS report.
Return


 VIEW All