


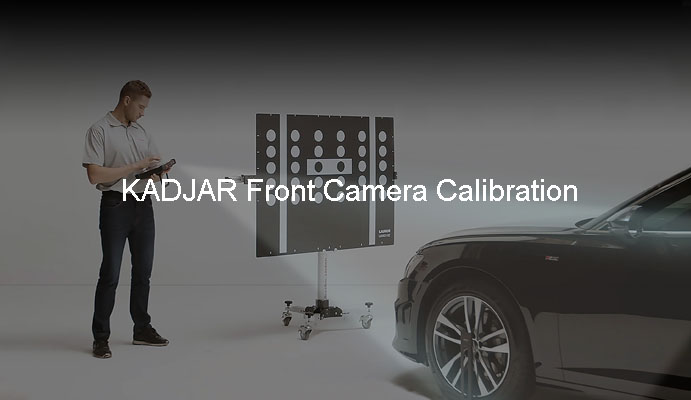
With its powerful calibration function and low price, X-431 ADAS LITE becomes the most cost-effective choice for automotive ADAS calibration. With its powerful calibration function and low price, X-431 ADAS LITE becomes the most cost-effective choice for automotive ADAS calibration.
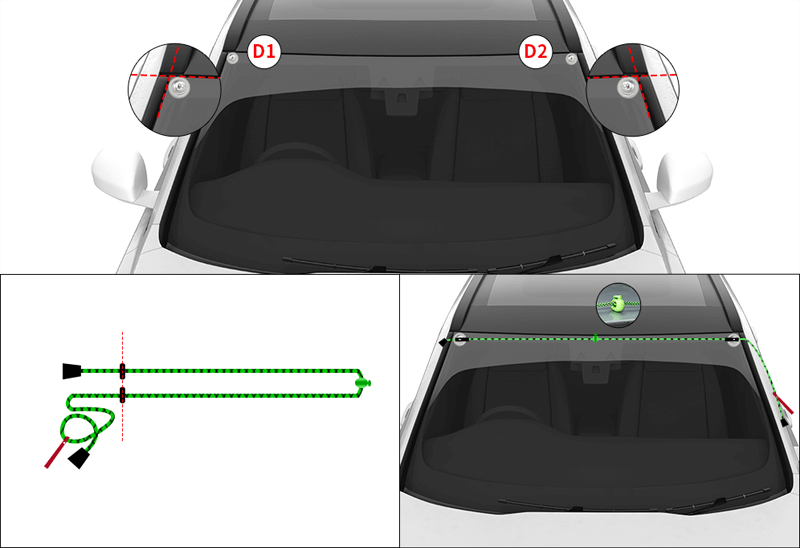
First, use suction cups to mark point D1 and point D2 on the upper left corner and upper right corner of the front windshield of the vehicle respectively.
Second, use the centering auxiliary line to align the symmetrical points at both ends.
Thirdly, remove the centering auxiliary line and fold the two ends in half.
Fourth, move the centering reference point to the center of the auxiliary line, and reposition the alignment and positioning auxiliary line at point D1 and point D2.
Note: It is necessary to keep the wire harness in a tightened state when positioning the centering auxiliary line.
According to different models, it is divided into the following three situations.
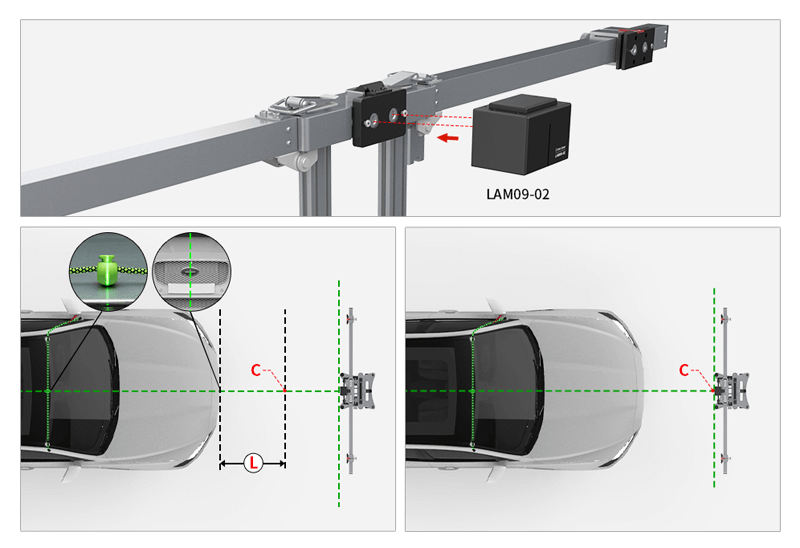
1. Install and open cross laser LAM09-02.
2. Move the device to the front of the vehicle so that the longitudinal laser line of the cross laser device LAM09-02 passes through the center of the vehicle logo and the centering mark on the roof respectively. Place a cross-positioning mark on its longitudinal laser line, marking point C, so that the distance from the front bumper of the vehicle to point C is L, L=_______mm.
3. Move the device so that the laser intersection point of the cross-laser instrument LAM09-02 coincides with point C. The longitudinal laser line passes through the center of the vehicle logo and the centering mark on the roof respectively.
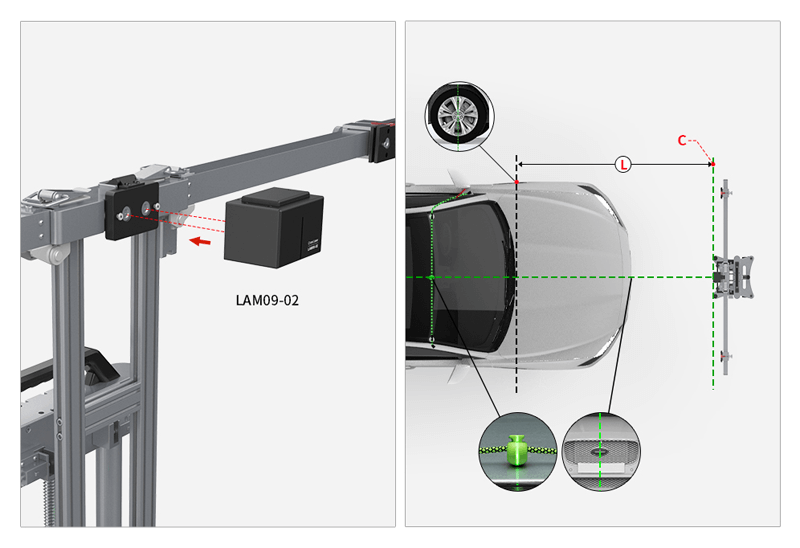
1. Place the L-shaped positioning bracket LAM09-05 at the center of the front hub of the vehicle.
2. Measure the distance from the center of the front wheel to the target as L, L=_______mm, place a cross-positioning marker, and mark point C.
3. Install and switch on the cross laser LAM09-02.
4. Move the device so that the horizontal laser line of the cross laser LAM09-02 passes through point C, and the vertical laser line passes through the center of the vehicle logo and the centering mark respectively.
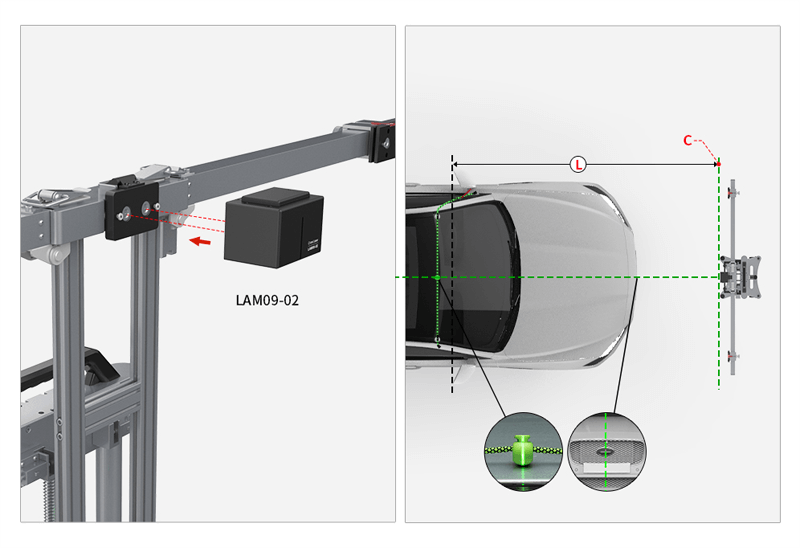
1. Place the L-shaped positioning bracket LAM09-05 on the side of the vehicle to align it with the camera.
2. Measure the distance from the center of the front camera to the target as L, L=_______mm, place a cross-positioning marker, and mark point C.
3. Install and switch on the cross laser LAM09-02.
4. Move the device so that the horizontal laser line of the cross laser LAM09-02 passes through point C, and the vertical laser line passes through the center of the vehicle logo and the centering mark on the roof respectively.
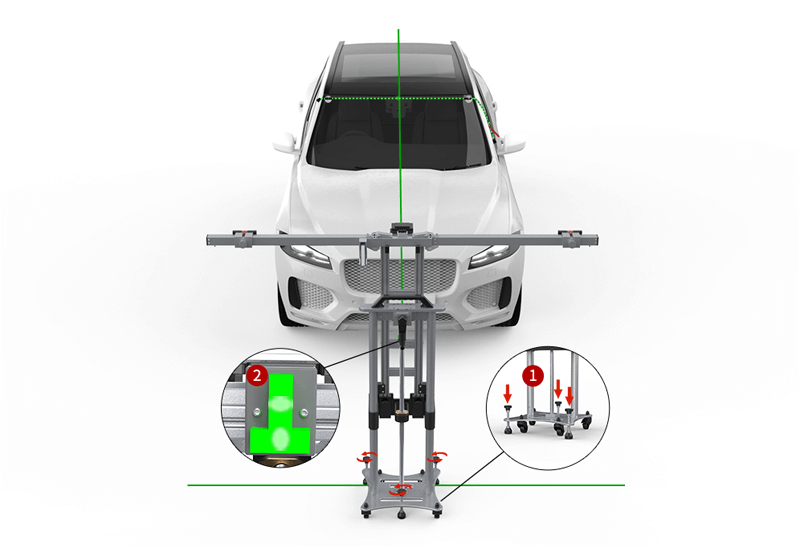
1. Adjust the base knob ① so that the horizontal bubble ② is located in the center area.
2. Confirm again that the longitudinal laser line passes through the center of the vehicle logo and the alignment reference point respectively, and the distance L between the equipment and the vehicle remains unchanged.
1. Turn off the cross laser LAM09-02 and remove it.
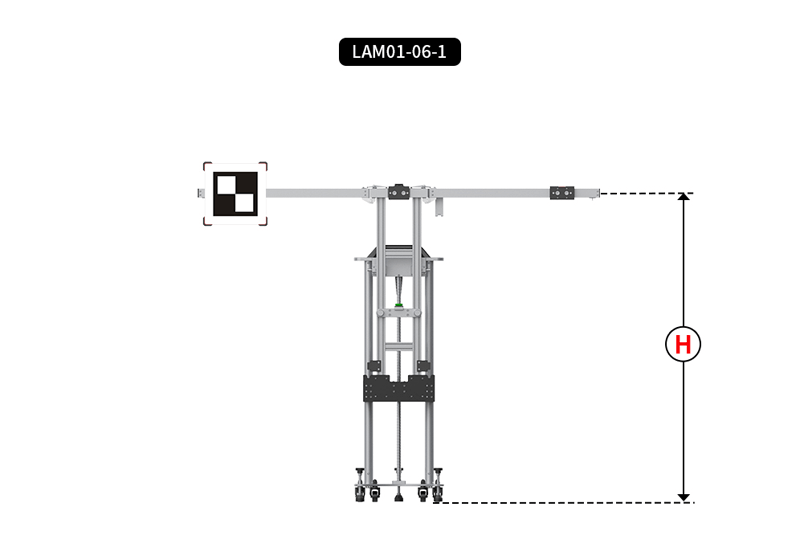
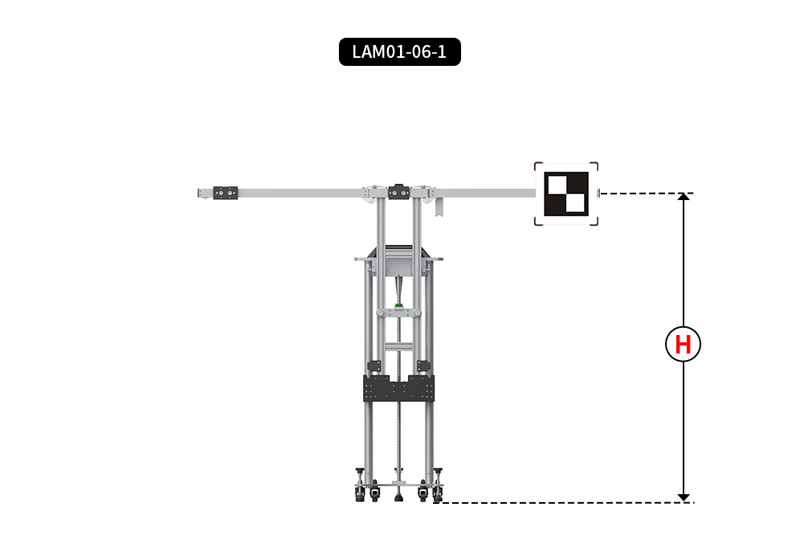
2. Use the LAM01-XX target, align the groove at the bottom of the target with the locking position of the support bar, and lock and fix the target through the left and right sliders.
3. Adjust the height of the equipment and observe the electronic range finder, H=_______mm.
1. Turn off the cross laser LAM09-02 and remove it.
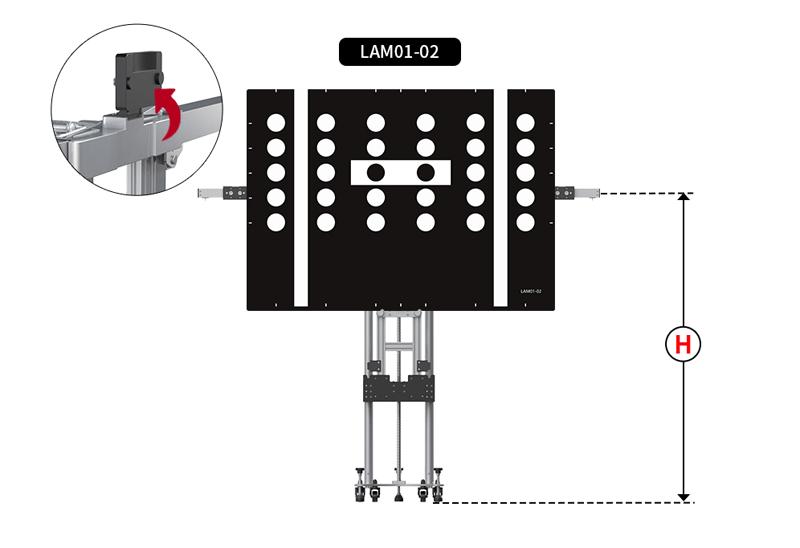
2. Use the LAM01-XX target, and install the target on the center mounting plate.
3. Adjust the height of the equipment and observe the electronic range finder, H=_______.

1. Turn off the cross laser LAM09-02 and remove it.
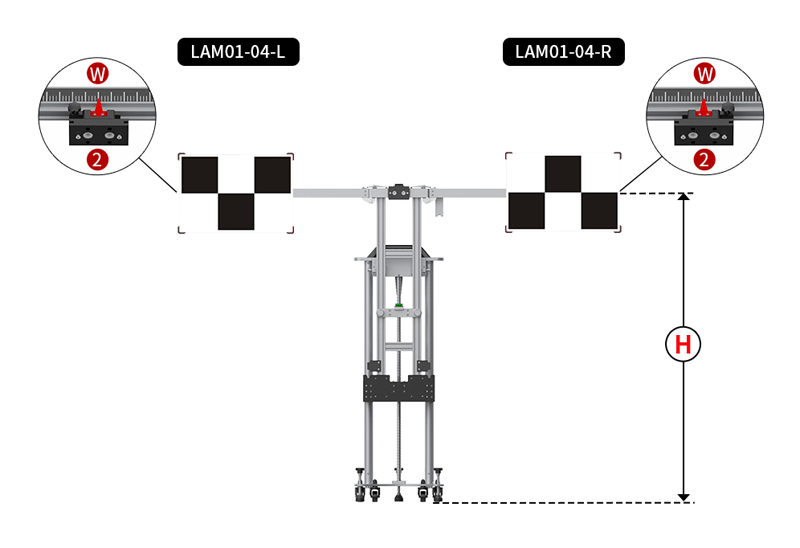
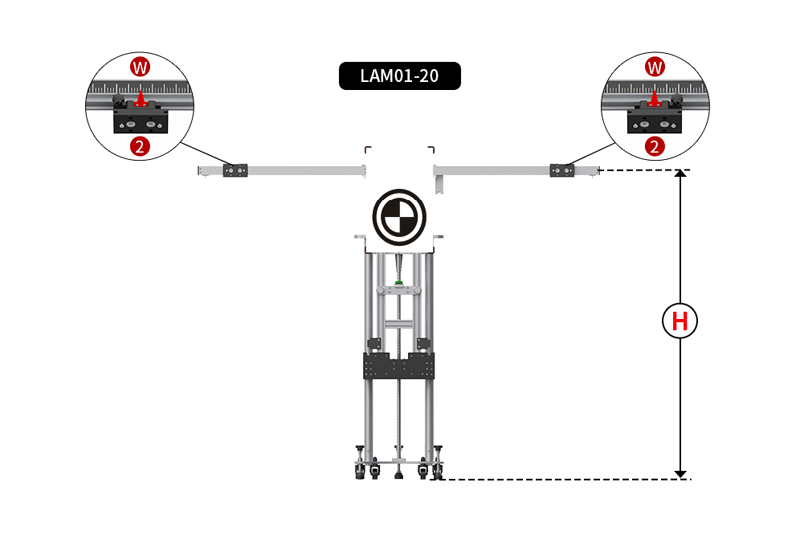
2. Move the left and right slider ② to position W, W=_______.
3. Use the target LAM01-XX and LAM01-XX, and install the target on the left and right sliders ②.
4. Adjust the height of the equipment and observe the electronic range finder, H=_______.
1. Turn off the cross laser LAM09-02 and remove it.
2. Move the left and right slider ② to position W, W=______.
3. Use a LAM01-XX target, and install the target on the center mounting plate.
4. Adjust the height of the equipment and observe the electronic range finder, H=_______.
Install the target switch onto the left slide.
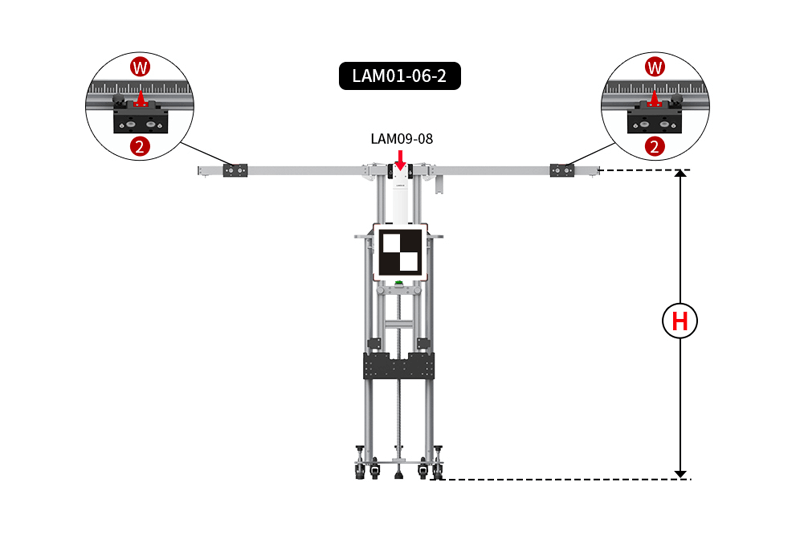
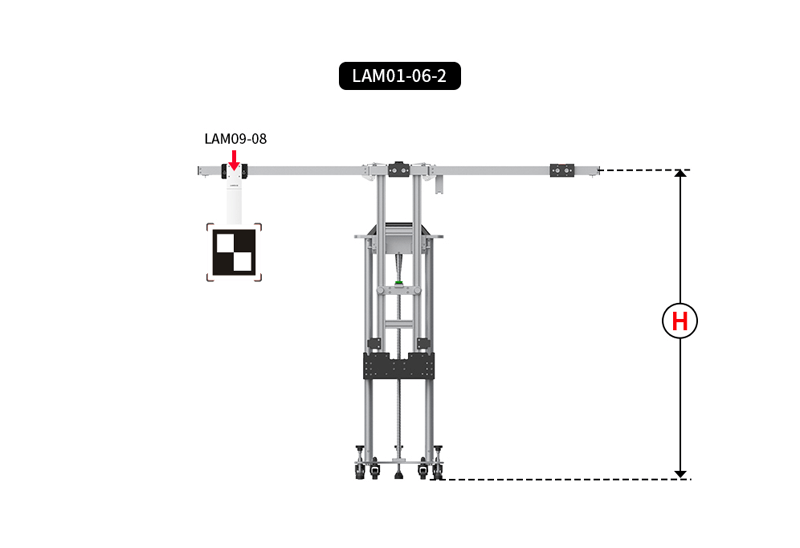
1. Turn off the cross laser LAM09-02 and remove it.
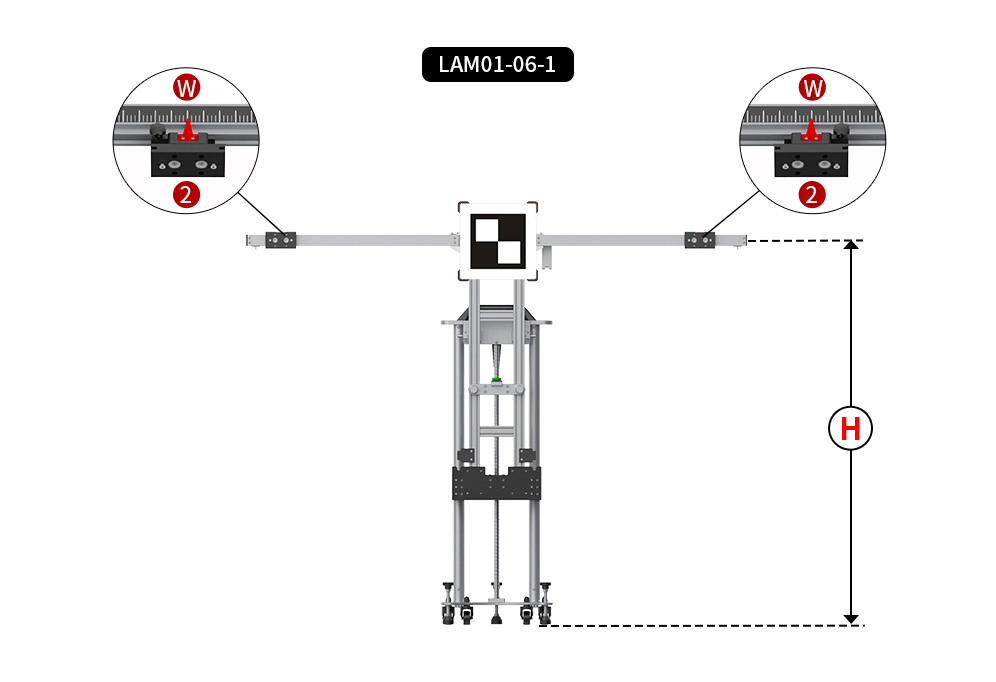
2. Move the left and right slider ② to position W, W=_______.
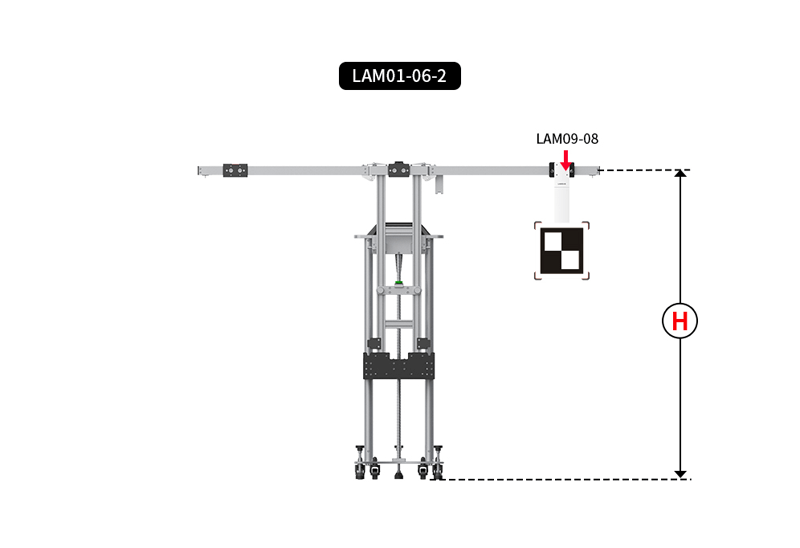
3. Use the LAM01-XX target, install the target on the extension pole LAM09-08, and hang it on the middle hanging plate.
4. Adjust the height of the equipment and observe the electronic range finder, H=_______.
Install the target switch onto the left slide.
Install the target switch onto the right slide.
Small Target - Situation 5: Single Target/Multiple Positions - Extension Pole Mode
1. Turn off the cross laser LAM09-02 and remove it.
2. Move the left and right slider ② to position W, W=_______.
3. Use a LAM01-XX target, and install the target on the center mounting plate.
4. Adjust the height of the equipment and observe the electronic range finder, H=_______.
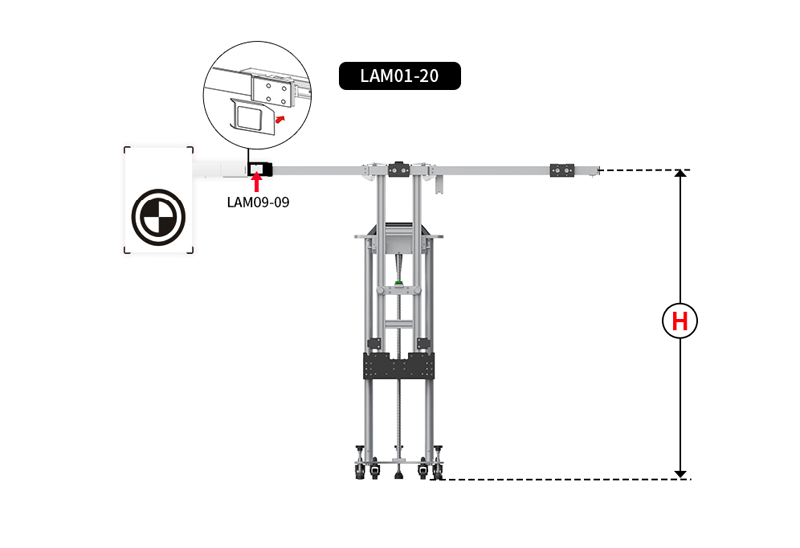
Install the target on the extension pole LAM09-09, and hang it on the left slider.
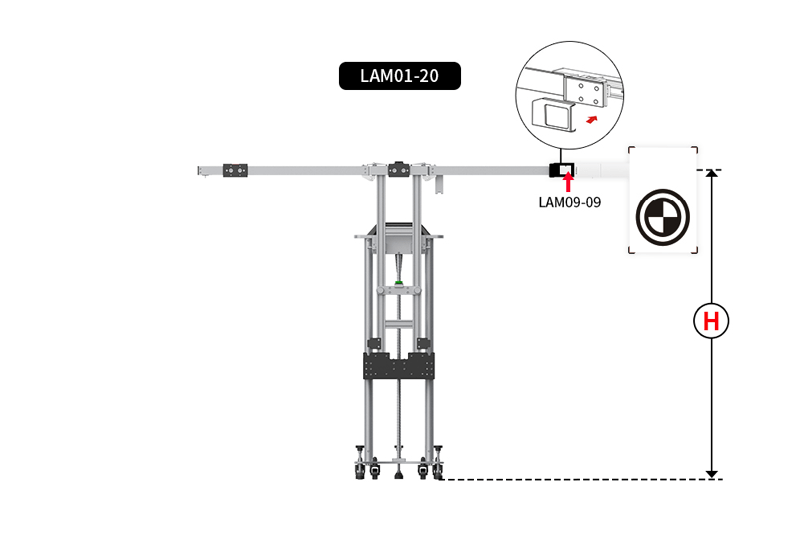
Install the target on the extension rod LAM09-09, and hang it on the right slider.

Return


 VIEW All